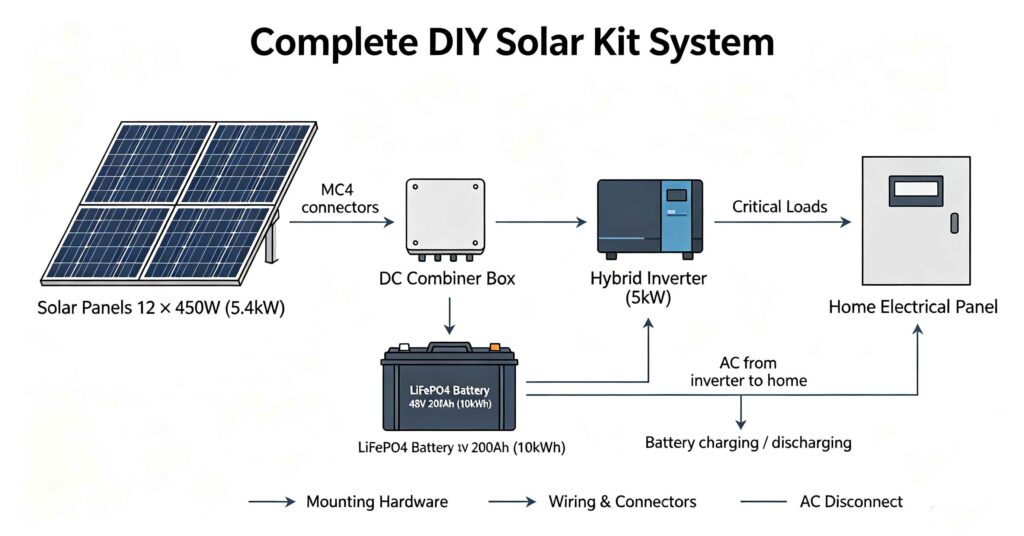
DIY solar panel kit is a pre-packaged set of components that includes solar panels, an inverter (or charge controller + inverter), mounting hardware, wiring, and sometimes a battery bank, designed for a homeowner or small business to install a solar power system without hiring a professional installer. A complete kit for a typical 5kW residential system includes 10–15 solar panels (400–550W each), a hybrid or grid-tie inverter (5kW), panel mounting rails and clamps, MC4 connectors and DC wiring, AC disconnect, and optionally a 10–20kWh lithium battery bank for backup. The key advantage of a kit is that all components are pre-selected to be compatible, eliminating the most common beginner mistake of mismatched voltages, currents, or communication protocols. The key risk is that kits vary widely in quality — a cheap kit may use low-efficiency panels, a non-ul-listed inverter, or undersized wiring — so buyers must verify component certifications and compatibility before purchasing.
The DIY solar market has exploded in recent years, driven by rising electricity costs, federal and state tax incentives, and the availability of affordable, high-quality components. A diy solar panel kit promises to make solar installation accessible to homeowners with basic electrical skills, but the reality is more nuanced: a poorly designed or incorrectly installed system can be dangerous, inefficient, or even void your home insurance. This guide explains what is actually inside a complete DIY solar kit, how to wire the components correctly, the 10 most common beginner mistakes, and how to size a system for your home. For battery bank sizing and chemistry selection, see #2 how to choose a solar battery bank.
What is inside a complete DIY solar panel kit
A complete diy solar panel kit should include every component needed to generate, convert, store, and distribute solar power. The exact contents vary by kit size and manufacturer, but a properly specified kit for a grid-tied or off-grid residential system includes the following core components.
Solar panels are the most visible component. Most modern kits use 400–550W monocrystalline PERC or TOPCon panels, with 10–15 panels for a typical 5–8kW residential system. Panels should have a minimum 25-year performance warranty and be certified to IEC 61215 and IEC 61730 standards.
The inverter is the brain of the system. Grid-tie kits use a string inverter or microinverters; off-grid or hybrid kits use a hybrid inverter that combines a charge controller, inverter, and battery management interface. The inverter must be sized to match the panel array capacity and be compatible with the battery voltage (typically 48V for residential systems).
| Component | Typical spec for 5kW kit | What to verify |
|---|---|---|
| Solar panels | 10–15 × 400–550W monocrystalline | IEC 61215/61730 certified, 25-year warranty, efficiency ≥20% |
| Inverter | 5kW string / hybrid / microinverter | UL 1741 certified, compatible with battery voltage, warranty ≥10 years |
| Mounting hardware | Rails, clamps, flashing, lag bolts | UL 2703 certified, rated for your roof type and wind load |
| Wiring & connectors | MC4 connectors, DC wire, AC wire | UV-rated, correctly gauged for current, MC4 compatible |
| Combiner / disconnect | DC combiner box, AC disconnect switch | UL listed, includes breakers or fuses |
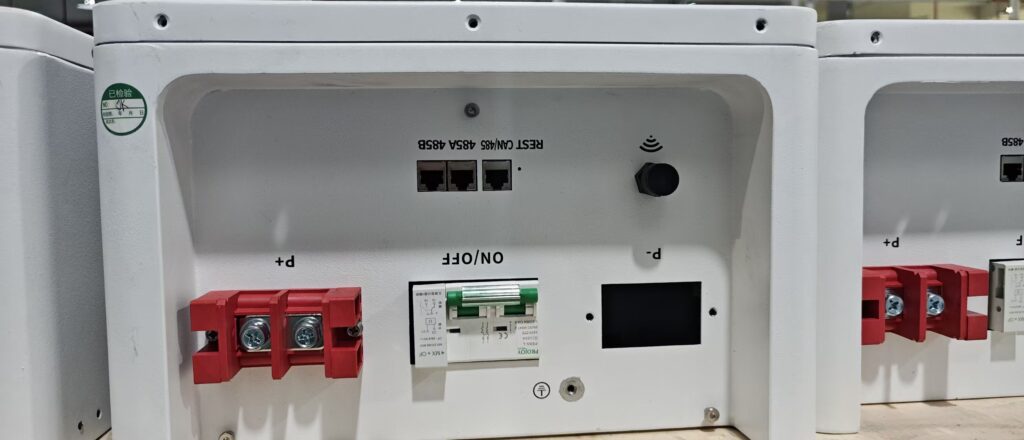
| Battery (optional) | 48V 100–200Ah LiFePO4 (5–10kWh) | UL 1973 / 9540 certified, compatible with inverter BMS |
| Monitoring | WiFi monitoring app / portal | Real-time production data, fault alerts, historical reporting |
How to wire a DIY solar kit: series vs parallel
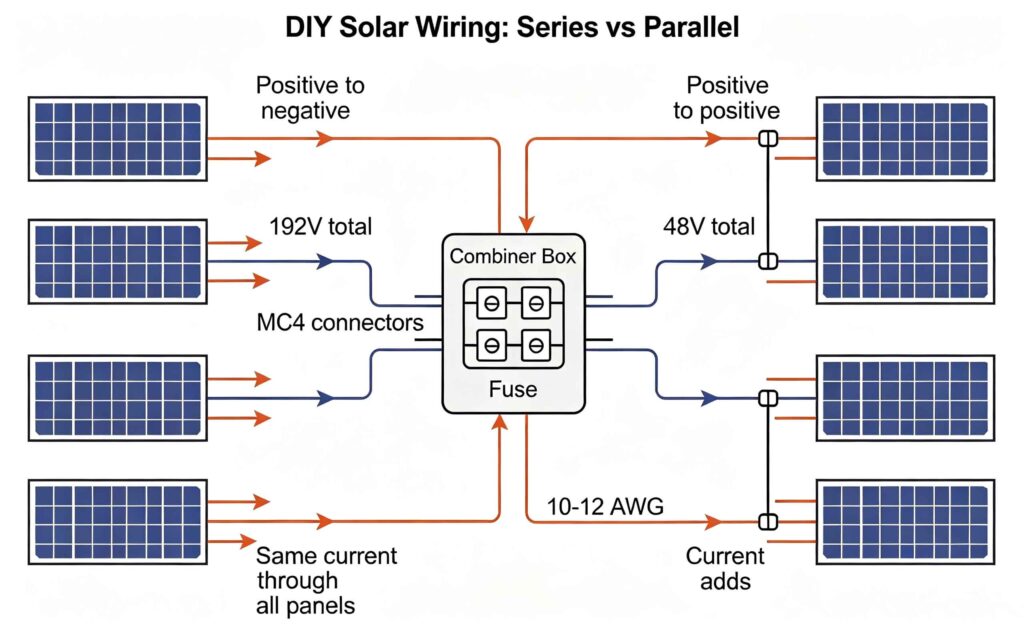
The most critical wiring decision in a DIY solar kit is whether to connect panels in series, parallel, or a series-parallel combination. This decision determines the system voltage and current, which must match the inverter input specifications.
Series connection connects panels positive-to-negative, adding voltages while keeping current the same. For example, four 48V panels in series produce 192V at the same current. Series connection is used to reach the minimum voltage required by the inverter (typically 150–500V DC for string inverters). The risk of series connection is that partial shading on one panel reduces the output of the entire string.
Parallel connection connects panels positive-to-positive and negative-to-negative, adding currents while keeping voltage the same. Parallel connection is less common in modern string inverter systems but is used in some 12V/24V off-grid systems. The advantage is that shading on one panel does not affect other panels in the parallel string; the disadvantage is that higher current requires thicker, more expensive wiring.
- Calculate your string voltage. Multiply the panel open-circuit voltage (Voc) by the number of panels in series. This must be within the inverter MPPT voltage range (typically 150–500V) and below the maximum DC input voltage.
- Calculate your string current. The short-circuit current (Isc) of one panel determines the minimum wire gauge. Use the NEC 125% derating rule: wire ampacity ≥ Isc × 1.25.
- Use MC4 connectors correctly. MC4 connectors are the industry standard for solar panel wiring. Ensure male and female connectors are from the same manufacturer to avoid poor connections. Never use electrical tape or wire nuts for DC solar connections.
- Install a DC combiner box. For systems with multiple strings, a combiner box brings all strings together and includes fuses or breakers for each string. This is a safety requirement for systems over 3 strings.
- Install an AC disconnect. An AC disconnect switch between the inverter and the home electrical panel is required by code for servicing and emergency shutdown.
The 10 most common DIY solar kit mistakes
DIY solar installation is accessible, but mistakes can be expensive or dangerous. Based on installation experience and community reports, these are the 10 most common mistakes beginners make when installing a diy solar panel kit.
- Undersized wiring. Using wire that is too thin causes voltage drop, overheating, and potential fire. Always use the NEC 125% derating rule and consult a wire gauge chart.
- Mismatched panel voltages. Mixing panels with different Voc or Isc in the same string causes mismatch losses and can damage panels. Use identical panels in each string.
- Incorrect inverter sizing. An inverter that is too small cannot handle the panel array output; one that is too large wastes money. A typical ratio is 1.1–1.25× panel DC to inverter AC.
- No rapid shutdown. NEC 2017+ requires module-level rapid shutdown for rooftop systems. Many cheap kits do not include this; verify compliance before purchasing.
- Poor roof flashing. Improperly sealed roof penetrations cause water leaks. Use UL 2703 listed flashing and seal all penetrations with roofing cement or butyl tape.
- Ignoring local permits. Most jurisdictions require a building permit and electrical inspection for solar installations. Skipping permits can void insurance and create problems when selling the home.
- Wrong battery chemistry. Using lead-acid batteries in a high-cycle DIY system leads to early failure. LiFePO4 is the recommended chemistry for residential solar storage due to 6,000–10,000 cycle life and 80–90% depth of discharge.
- No surge protection. Solar panels are exposed to lightning and power surges. Install DC and AC surge protective devices (SPDs) to protect the inverter and battery.
- Improper grounding. Solar systems require both equipment grounding (panel frames, inverter chassis) and system grounding (DC negative or positive grounded per inverter specs). Poor grounding is a safety hazard.
- Overestimating production. Beginners often assume panels produce their rated output 8 hours a day. Real-world production is typically 3–5 peak sun hours per day, with derating for temperature, dust, inverter efficiency, and wiring losses.
How to size a DIY solar kit for your home
Sizing a DIY solar kit correctly is the difference between a system that meets your needs and one that falls short. The sizing process involves four steps: calculate your energy usage, determine your peak sun hours, size the panel array, and size the battery bank (if including storage).
First, calculate your daily energy usage in kilowatt-hours (kWh) by reviewing your utility bills. A typical US home uses 25–35 kWh per day, but this varies widely by location, home size, and appliance efficiency. For a DIY system, most homeowners start with a partial system (5–10kW) covering 30–60% of usage, rather than a full off-grid system.
Second, determine your average peak sun hours per day using NREL PVWatts or a solar resource map. Most of the continental US receives 3.5–5.5 peak sun hours per day annually. For example, a home in Arizona receives ~5.5 peak sun hours, while a home in Seattle receives ~3.5.
Third, calculate the required panel array size: Array size (kW) = Daily usage (kWh) / Peak sun hours / System efficiency (typically 0.75–0.80). For example, a home using 20 kWh/day with 4 peak sun hours and 80% efficiency needs 20 / 4 / 0.80 = 6.25 kW of panels.
For battery sizing, multiply your daily backup usage by the desired number of autonomy days, then divide by the battery depth of discharge (80% for LiFePO4). For example, 10 kWh/day backup × 2 days / 0.80 = 25 kWh of battery capacity. For battery chemistry and sizing details, see #1 LiFePO4 batteries complete guide.
Q.What is included in a DIY solar panel kit?
A complete DIY solar panel kit includes solar panels, an inverter (string, hybrid, or microinverter), mounting hardware (rails, clamps, flashing), wiring and MC4 connectors, a DC combiner box and AC disconnect, and optionally a lithium battery bank and monitoring system. The exact contents vary by kit size and manufacturer, but a properly specified kit should include every component needed for a code-compliant installation. Always verify that all components are UL or IEC certified and compatible with each other.
Q.How much does a DIY solar panel kit cost?
A DIY solar panel kit for a typical 5kW residential system costs $8,000–$15,000 before incentives, or $1.60–$3.00 per watt. A 10kW kit costs $14,000–$25,000. Kits with lithium battery storage add $5,000–$12,000 depending on capacity (10–20kWh). After the 30% federal Investment Tax Credit (ITC) and state/local incentives, net cost is typically 30–50% lower. DIY saves 20–30% compared to professional installation, but requires electrical knowledge and permit handling.
Q.Can I install a DIY solar kit myself?
Yes, if you have basic electrical skills, can follow detailed instructions, and are comfortable working on your roof and electrical panel. Most DIY kits include detailed installation manuals and customer support. However, you must obtain the required building and electrical permits, pass inspections, and comply with NEC code requirements including rapid shutdown, grounding, and wire sizing. If you are not comfortable with electrical work, hire a licensed electrician for the AC connection and inspection. Never work on live electrical circuits without proper training and PPE.
Q.How many solar panels do I need to power my house?
The number of solar panels needed depends on your daily energy usage, local peak sun hours, and panel wattage. For a typical US home using 25–35 kWh/day with 4 peak sun hours, you need 8–12 kW of panels, or 18–30 panels at 400W each. A smaller DIY system (5kW, 10–13 panels) typically covers 30–50% of home usage. Use NREL PVWatts or a solar calculator for a precise estimate based on your address, roof orientation, and shading. Remember to account for 20–25% system losses from temperature, dust, inverter efficiency, and wiring.
Q.What is the difference between grid-tie, hybrid, and off-grid solar kits?
Grid-tie kits connect to the utility grid and do not include batteries — they power your home during the day and export excess power to the grid for net metering credits. They are the cheapest and simplest option but provide no power during outages. Hybrid kits include a battery bank and can operate both grid-tied and off-grid, providing backup power during outages while still benefiting from net metering. Off-grid kits are designed for locations with no utility connection and include a larger battery bank and often a backup generator. Choose based on whether you have grid access and whether outage backup is important to you.
Next step: size and spec your DIY solar kit before you buy
A diy solar panel kit is a cost-effective way to go solar, but the savings disappear if you buy the wrong size, mismatched components, or non-certified equipment. Take the time to calculate your energy usage, size the array and battery correctly, and verify that every component in the kit is certified and compatible. The best DIY solar kits are not the cheapest — they are the ones that include UL-listed components, detailed installation support, and a clear warranty for every part.
- Read the complete LiFePO4 battery guide in #1
- Learn how to size a solar battery bank in #2
- Understand off-grid system design in #23
- Review solar battery cost considerations in #7
- Ask leekooenergy for a DIY solar kit specification that includes: recommended panel quantity and wattage for your roof and usage, inverter type and size (grid-tie, hybrid, or off-grid), LiFePO4 battery capacity and voltage for your backup needs, complete component list with UL/IEC certification verification, wire gauge and MC4 connector specifications, mounting hardware for your roof type, and a step-by-step installation checklist with permit guidance — so your DIY solar installation is safe, code-compliant, and properly sized from day one