A solar battery kit contains the parts needed to assemble one battery pack: cells, a battery management system, busbars and fasteners, a balance and communication harness, and usually an enclosure. It does not normally include an inverter, charge controller, or the DC protection devices between the pack and the rest of the system. Knowing exactly where that boundary sits is the difference between a kit that arrives complete and a kit that sends you back to the supplier twice.
What Is a Solar Battery Kit?
Definition. A solar battery kit is a bundled set of components supplied for assembling a single lithium battery pack for solar or off-grid use. A typical kit is built around a series string of LiFePO4 cells — 4S for a 12 V pack, 8S for 24 V, 16S for 48 V — matched with a battery management system rated for that string, plus the mechanical and electrical hardware needed to connect them. The buyer performs the assembly; the supplier performs the matching.
That last sentence is the reason kits exist. Cell matching — grouping cells with similar capacity and internal resistance into one string — is tedious to do at home and consequential if done badly. A mismatched string will keep the BMS balancing continuously and will lose usable capacity because the weakest cell hits its cut-off first.
So a kit is not simply a discount bundle. It is a bundle in which the matching has already been done, which is what a bag of individually purchased cells does not give you.
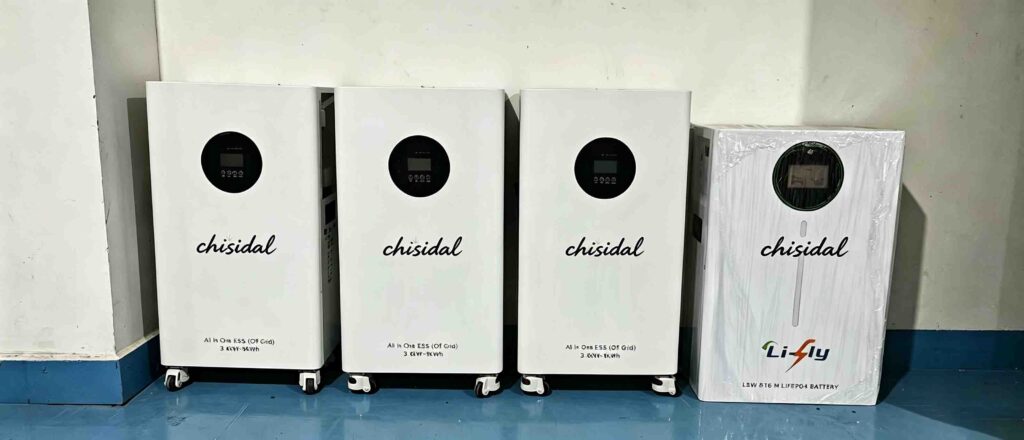
The Complete Parts Checklist
Use this list when comparing kits. Items 1 to 6 appear in almost every kit. Items 7 to 11 are the ones that vary, and they are where two kits at similar prices turn out to be different products.
- Cells. Quantity matching the series count, with stated capacity, grade and manufacturer.
- Battery management system. Rated for the same series count and for the intended continuous current.
- Busbars and fasteners. Copper or nickel-plated busbars sized for the current, plus bolts, washers and insulating spacers.
- Balance wire harness. Pre-terminated, with the correct number of taps for the series count.
- Terminal hardware and cable lugs. Sized for the main positive and negative connections.
- Enclosure or rack case. A metal or ABS solar battery box, or a 19-inch rack case, with mounting points for the BMS.
- Cell compression or spacers. Prismatic LiFePO4 cells need a defined compression to control swelling over their life. Some kits include end plates and banding; many do not.
- DC protection. A main fuse or breaker rated for the pack. Frequently excluded and frequently assumed.
- Communication cable and protocol documentation. Needed if the BMS must talk to a hybrid inverter over CAN or RS485.
- Monitoring display or Bluetooth module. Sometimes bundled, sometimes an accessory.
- Assembly documentation. Torque specification for the terminal bolts, wiring diagram, and the top-balancing procedure.
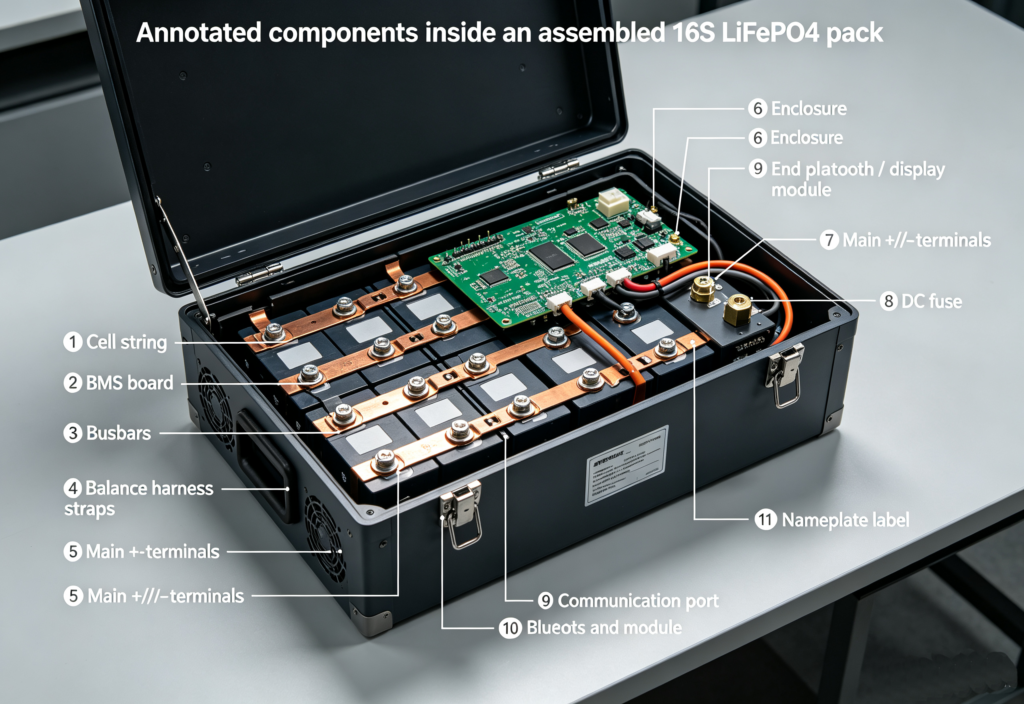
Item 11 is worth singling out. Terminal bolt torque is a real specification, not a matter of feel. Under-torqued terminals create resistance and heat at the joint; over-torqued terminals can damage the cell’s threaded insert, which is not repairable. A kit that ships without a torque figure is a kit that expects you to guess.
Kit, Loose Parts, or an Assembled Battery?
There are three ways to arrive at a 48 V pack, and the right one depends on how much of the risk you want to hold.
| Complete kit | Loose parts, sourced separately | Assembled battery | |
|---|---|---|---|
| Cell matching | Done by supplier | Your responsibility | Done by supplier |
| Component compatibility | Verified as a set | Your responsibility | Not applicable |
| Assembly labour | You, typically half a day | You, plus sourcing time | None |
| Cost per usable kWh | Lower than assembled | Lowest, if nothing goes wrong | Highest |
| Warranty scope | Usually components only | Per individual supplier | Whole product |
| Certification for resale | Not transferable to your build | Not transferable | System-level certificates apply |
| Best for | Competent DIY builders, local assemblers | Experienced builders with test equipment | Installers, resale, insured installations |
The certification row is the one that catches small assemblers. A certificate held by the cell manufacturer does not transfer to a pack you assembled. If the pack is going into a customer’s house, or into an installation that must satisfy an insurer or an inspector, an assembled and system-certified battery is usually the only defensible option.
The Four Components That Decide Kit Quality
Price differences between kits concentrate in four places.
Cells. Ask for the manufacturer, the model, and the grade. Grade A cells are within the manufacturer’s full specification. Grade B cells are functional but fall outside it on capacity, internal resistance or appearance, and they are legitimate for some uses provided they are sold as what they are. What matters is that the grade is stated in writing, along with the measured capacity and internal resistance of the actual cells shipped.
BMS. Three numbers decide whether a BMS suits the build: continuous current rating, balancing current, and whether it supports the communication protocol your inverter expects. Balancing current is the one most often ignored. A BMS with very low passive balancing current will take a long time to correct a drifting string, which matters more on a large pack than a small one.
Busbars and hardware. Busbar cross-section has to suit the continuous current, and the plating has to resist corrosion at the joint. Flexible braided busbars accommodate cell movement better than rigid bars on packs that will see temperature swings.
Enclosure. Rack cases suit stacked installations and make cabling tidier. A wall or floor solar battery box suits single packs and outdoor-adjacent locations, where the ingress rating matters. Kits sold as a two-battery solar battery box are enclosures sized for two packs in parallel — useful for phased expansion, but confirm the busbar and the main fuse are rated for the combined current rather than for one pack.
Assembly Sequence
The order matters, and one step is frequently skipped.
- Inspect and record. Check every cell for physical damage, then measure and record open-circuit voltage and internal resistance. Keep the record; it is the baseline for any warranty conversation.
- Top balance before assembly. Charge all cells in parallel to the same full voltage before connecting them in series. This is the step that gets skipped, and skipping it means the BMS spends the pack’s early life trying to fix a problem that a bench supply could have fixed in a day.
- Compress and fix the cells. Fit spacers, end plates and banding to the specified compression before making electrical connections.
- Install busbars to the specified torque. Use a torque wrench. Work in a pattern, not sequentially along the string.
- Fit the BMS and balance harness. Connect the balance taps in order and verify each cell reading against your measurements before applying load.
- Configure and test. Set the BMS parameters for the cell chemistry, then run a controlled charge and discharge cycle while monitoring individual cell voltages.
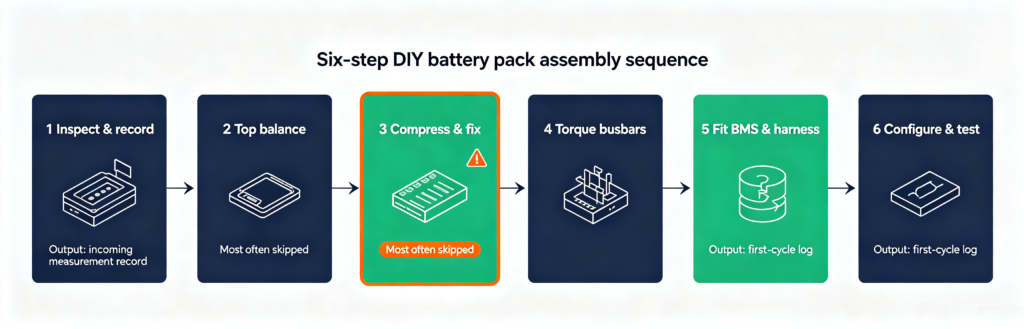
Steps 1 and 6 produce the two documents worth keeping: the incoming measurement record and the first-cycle log. Between them they answer most warranty questions before they turn into arguments.
What Kits Usually Do Not Include
Budget for these separately unless the supplier confirms otherwise in writing: the inverter or charge controller, the DC main fuse or breaker, battery cables above the length supplied, a torque wrench and insulated tools, a bench power supply for top balancing, and any shipping surcharge for lithium cells as dangerous goods.
The last one surprises people. Cells ship under dangerous-goods rules, which affects freight cost, carrier options and transit time, and it applies whether the cells are in a kit or bought loose.
When a Kit Is the Right Choice
- Choose a kit when: you are building one to a few packs, you want the cell matching handled, you have or will buy a torque wrench and a means of top balancing, and the installation is your own rather than a customer’s.
- Choose loose parts when: you already have test equipment and a preferred BMS, and you are willing to own compatibility risk to reach the lowest cost per kWh.
- Choose an assembled battery when: the pack goes into a customer installation, an inspector or insurer is involved, or you need a single warranty counterparty.
FAQ
Q. What comes in a solar battery kit?
Cells matched as a series string, a BMS rated for that string, busbars and fasteners, a balance wire harness, terminal hardware, and usually an enclosure. Compression hardware, a DC main fuse, communication cables and monitoring modules vary between suppliers and should be confirmed item by item before ordering.
Q. Do I need to top balance new cells?
Yes, in almost all cases. Charging all cells in parallel to the same voltage before series assembly gives the BMS a balanced starting point. Without it, the pack’s usable capacity is limited by whichever cell reaches its cut-off first, and passive balancing can take weeks or months to correct the drift.
Q. What BMS do I need for a 48 V LiFePO4 pack?
A 16S BMS, rated for the continuous current the inverter will draw, with the communication protocol your inverter supports. Check all three: series count, continuous amps and protocol. A BMS that matches on series count but not on protocol will work as a protection device while leaving the inverter without state-of-charge data.
Q. Is a DIY solar battery bank cheaper than a finished battery?
Per usable kWh, yes — typically meaningfully cheaper, because you supply the assembly labour and take on the assembly risk. The saving disappears if the build must be certified for a customer installation, since certificates held by component makers do not transfer to a self-assembled pack.
Q. Can I put two DIY packs in the same battery box?
Yes, if the box is designed for it and the shared busbar and main fuse are rated for the combined current. Both packs should also be at a similar state of charge before they are paralleled, and each pack keeps its own BMS.
Building your own pack?
Tell us the system voltage, the continuous current your inverter draws, the inverter brand and protocol, and whether the pack will sit in a rack or a wall box. We will confirm the series count, the BMS rating and whether compression hardware and a DC fuse are included, so nothing is missing when the pallet arrives.